Back up and restore your entire WordPress site with simple operations.
Set a schedule to perform regular automatic backups.
Back up at any time, or allow only manual deletion.
You can also specify files such as databases and plugins to back up.
Backups can be stored on various online services. *There is a paid version, but all of the above features are available in the free version.
①Install and activate the “UpdraftPlus” plugin.
②Go to UpdraftPlus > Settings.
③Set the following options and click “Save Changes.”
Specify the backup schedule and number of backups to keep.
Select the storage location.
Authenticate at the selected storage location.
Specify the files to include in the backup.
④ An authentication screen will appear at the online authentication site. Click “Allow” to grant UpdraftPlus access.
⑤ Click “Complete setup” to finish the configuration.
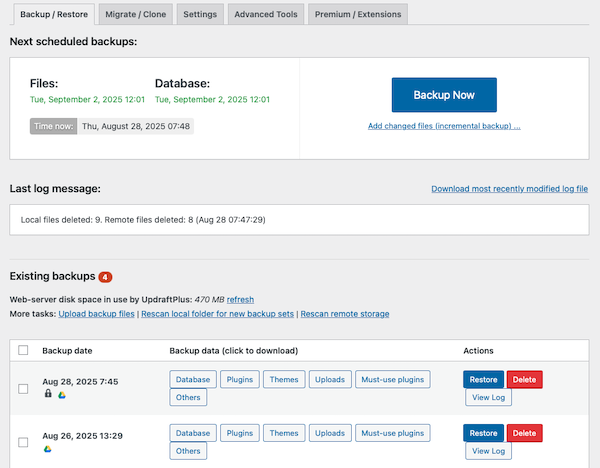
⑥ Return to UpdraftPlus > Backup / Restore. Backups will be automatically created according to the schedule specified in “Settings.”
⑦ Clicking “Backup Now” will display the settings for a new backup. If you check “Allow manual deletion only for this backup,” the backup will be created with a lock icon. Regardless of the specified number of backups, it will remain unless manually deleted.
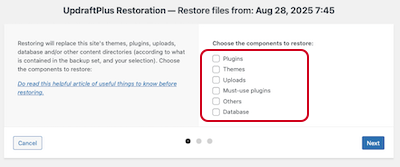
⑧ To restore, check the target backup and click “Restore.”
⑨ The target file selection screen will appear. Check the files and proceed to restore them.