I am developing a smartphone app (App), but when it comes to releasing it, the store’s application process requires that a privacy policy be published on my own website. At the time, I created and published the minimum required policy, but it ended up taking more effort and time than I had anticipated. I thought many others might be facing similar challenges, so when I decided to revamp my own website (hereinafter referred to as the landing page or LP), I decided to publish the creation process as a personal reference.
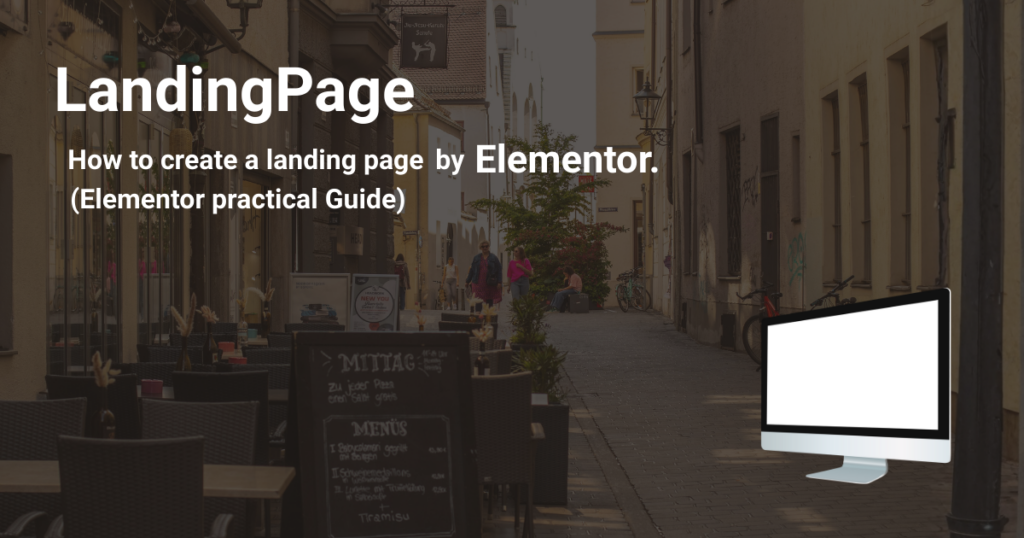
Last time, I used WordPress and purchased a well-known theme from overseas, using the template as a base. This time, I also used WordPress, but for design flexibility and freedom, I used Elementor to create the page from scratch, using the template only as a reference.
Of course, no coding knowledge of HTML or CSS is required, so even beginners can follow along without difficulty.
For the landing page creation required for app release, I used only the free version of Elementor. For the blog (this page) section, I also used Elementor Pro (paid version) for creation.
Here, I have not comprehensively covered and compared competing tools, but based on my comparison and evaluation, I have explained the steps to create the site as quickly as possible using the environment and tools I personally consider best in terms of design, customization, and ease of implementation. I hope this will be helpful for everyone.
How to create a landing page 1 – Custom Domain, Server, WordPress Installation
About the usage environment
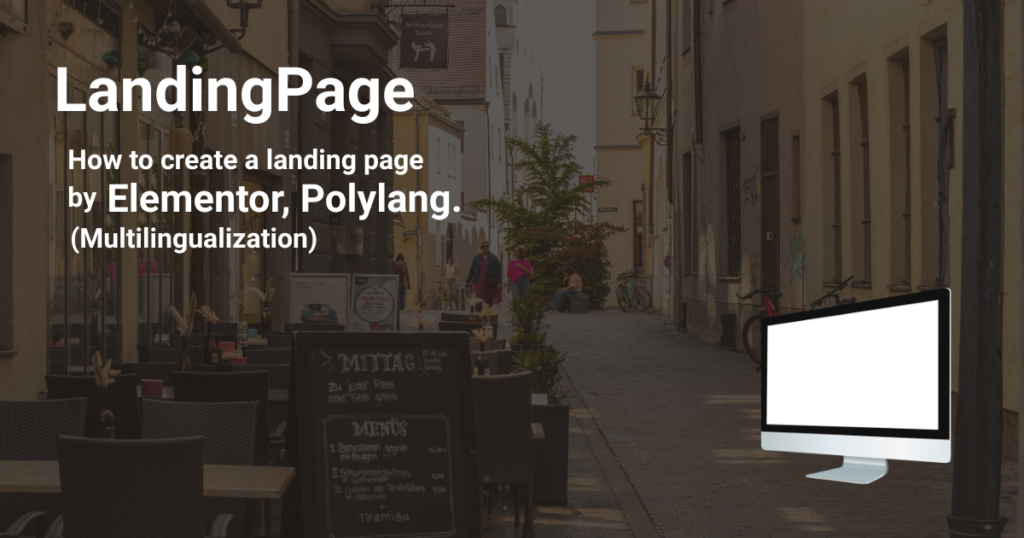
・Unique domain: MuuMuu Domain ・Rental server: Lolipop! ・Blog creation service: WordPress ・WordPress Theme: Hello Elementor ・WordPress plugins - Elementor (page builder) - Essential Adonis for Elementor (header) - MetForm (contact form) - Polylang (multilingual) Only free versions of plugins are used
Acquire a unique domain
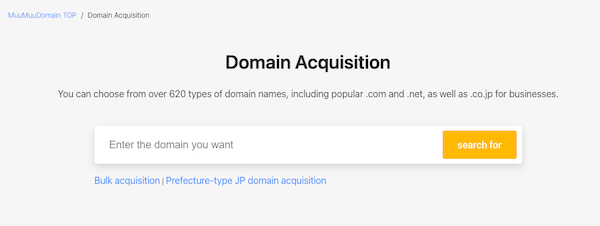
Acquire a custom domain at MuuMuu Domain
① Access MuuMuu Domain and register for a new account.
② Enter your desired domain in “Enter the domain you want”.
③ Click “search for”
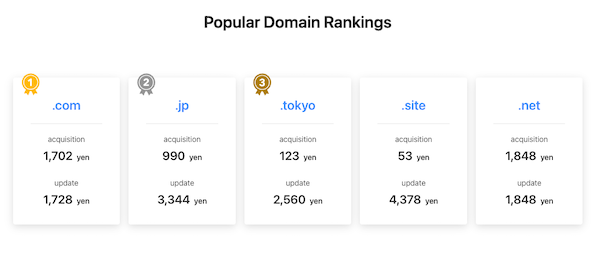
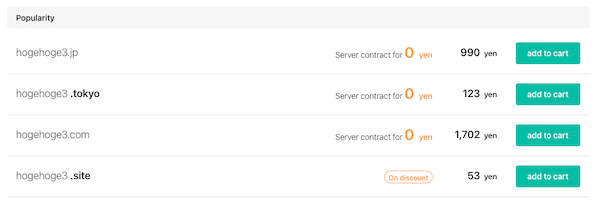
④ Available domains will be displayed along with their prices, so add your desired domain to your cart. Check both the initial registration fee and the renewal fee before selecting. For example, “hogehoge3.com” costs 999 yen per year for initial registration and 1,728 yen per year for renewal.
⑤ Add the desired domain to the cart.
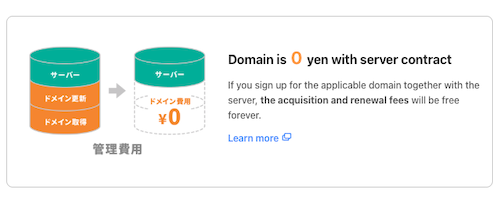
⑥ Click “Proceed to Application” to continue. There is an option for a server contract at 0 yen, but since we will be contracting the server through Lolipop this time, we will not select it.
Select the following and proceed.
Google Workspace: Not using at this time
MuuMuu Servers: Not using at this time
Domain contract period: 1 year
WHOIS public information: Proxy publication of MuuMuu Domain information
⑥ Confirm the “Payment amount,” enter the “Payment method,” and click “Next step.” ⑦ Review the terms of service, check the box to agree to the terms, and register the domain.
Even after registering the domain, you can check and make some changes from Account > Control Panel.
⑧ Domain information verification may take 24 to 72 hours. If the target domain is listed under Domain Operations > Domain List and “No domains currently pending verification” is displayed in the list of unverified domains, the procedure is complete.
Rental server contract
Sign up for a rental server with Lollipop!
Note: The Lollipop! Rental Server administrator page (Control Panel) is available only in Japanese, and there is no function to switch to English display. For users who do not use Japanese, please refer to the rental server contract and settings section for reference purposes only.
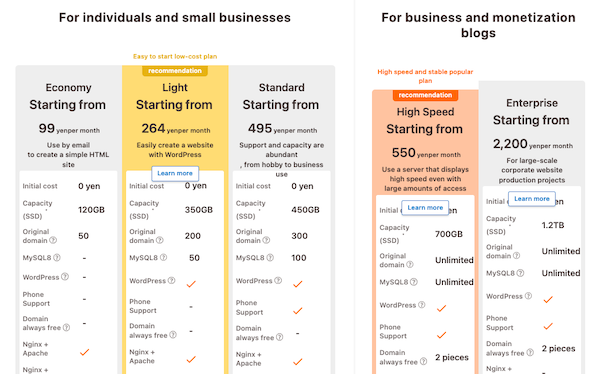
② Select a server plan and register a new account. Since WordPress is required, select the Light plan or higher. If you have no special needs, we recommend the Light plan.
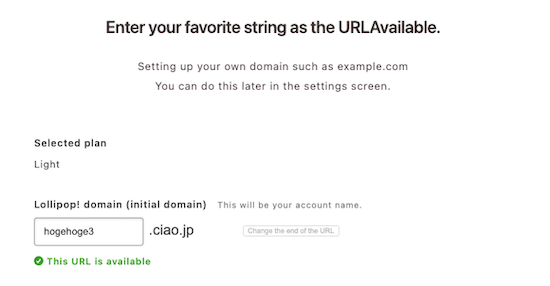
③ Set up your Lolipop! domain.
④ Enter the string in the box and click “Change the end of the URL” to change the end as well. If you set a custom domain, this account name is only used for accessing the server. If you set a custom domain, you will be able to access it using the custom domain, so any name is acceptable. If you do not set a custom domain, it will be published as the landing page URL.
⑤ Fill in the remaining required fields and complete the account creation.
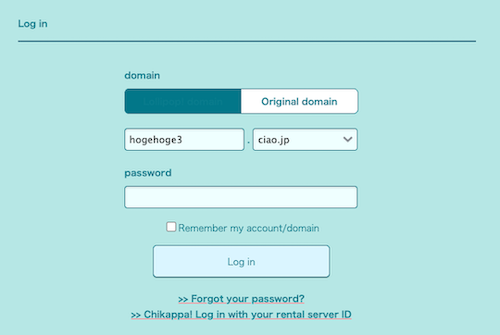
② Select “Lolipop! Domain” and log in with the domain (e.g., hogehoge3.ciao.jp) and password you set up when you signed up.
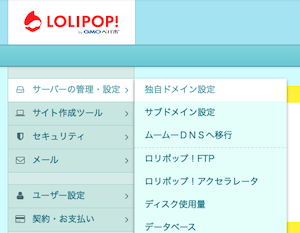
③ Access Server Management/Settings > Custom Domain Settings.
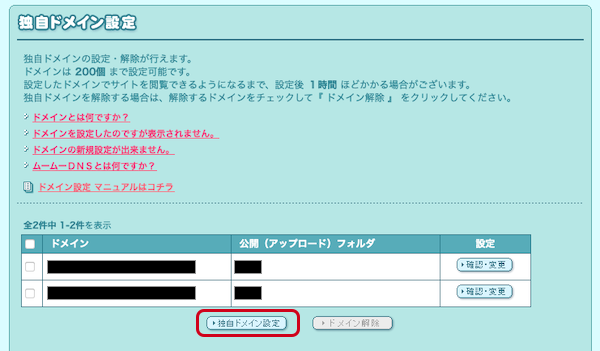
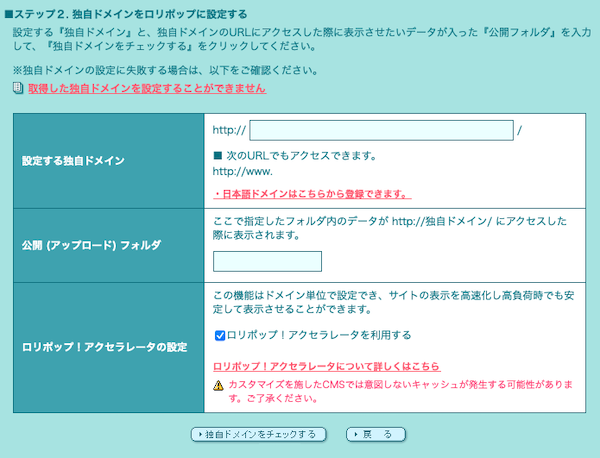
④ Set up the custom domain obtained from MuuMuu Domain.
Custom domain settings to be set up (e.g., hogehoge3.com)
Set up a public folder such as “aaa” or any other appropriate name. This will not be reflected in the URL.
Lolipop! allows you to set up multiple custom domains within the capacity limit, so it is advisable to separate the public folders. (e.g., Light Plan: 350GB capacity, up to 200 custom domains)
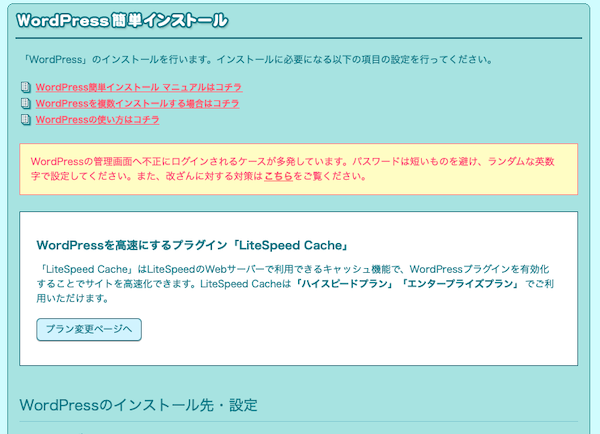
WordPress Installation
① Access Site Creation Tool > WordPress Easy Installation.
② Enter the installation destination and settings for WordPress.
The input details are as follows.
Installation destination
Site URL: The custom domain you set. Example: hogehoge3.com Database: Automatically create a new one.
WordPress settings
Site title: The name of the site to be published. Example: hogehoge3. *Can be changed later.
Username: The ID used to log in to the WordPress admin panel. *Cannot be changed later. *For security reasons, we recommend using a different name from the site name.
Password: Depending on the operational situation, it can be the same as the rental server’s password.
Email Address: Your usual email address. Site update information will be sent here.
Select the initial theme: WordPress default theme (free). *Can be changed later.
③ Click “Confirm Input” to complete the installation.
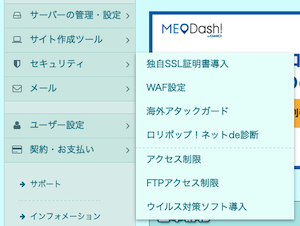
Security: SSL encryption for WordPress sites
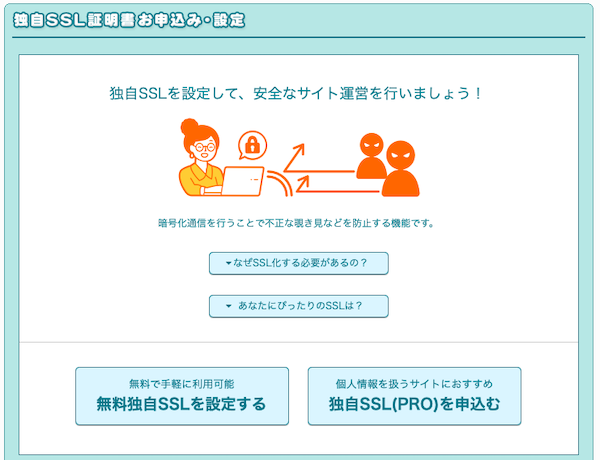
① Access Dashboard > Security > Install Custom SSL Certificate.
② Click “Set up free custom SSL.”
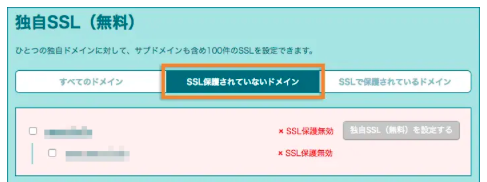
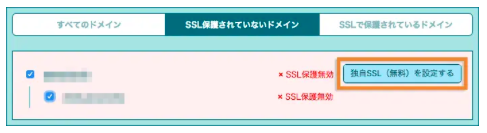
③ The domain will be displayed under “Domains not protected by SSL.”
④ Check the target domain and click “Set up custom SSL (free).”
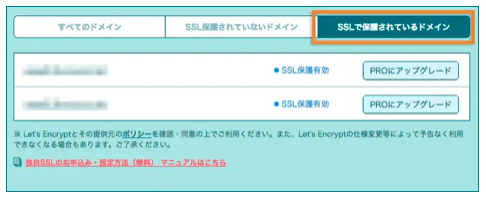
⑤ Once the settings are complete, it will show “SSL protection enabled,” and you will be redirected to “Domains protected by SSL.”
⑥ After setting up the custom SSL, the URL will change and you will no longer be able to access the site. You can check the URL of the WordPress site and admin panel from the following: Site Creation Tools > WordPress Easy Installation > WordPress Installation History If the URL starts with https://, the custom SSL setup is complete.
⑦ Access Settings > General Settings
The following are WordPress settings. Access the WordPress admin page.
⑧ Change the “WordPress Address (URL)” and “Site Address (URL)” to URLs starting with “https://” and save.
Security: WAF Settings
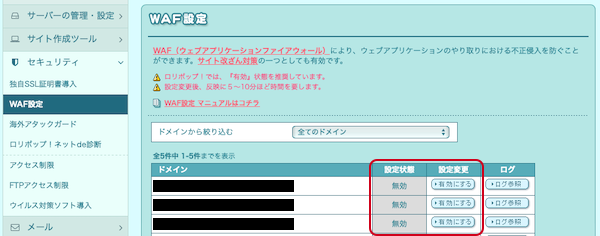
① Access Security > WAF Settings.
Note: Click “Disable” to change the setting to “Disabled.” Note that if WAF is enabled, you will not be able to edit with Elementor afterward.
How to create a landing page 1 – Custom Domain, Server, WordPress Installation